Sunday, July 28, 2013

The Lake Tecumseh Trip

 
   This is off a canal from Lake Tecumseh that has a narrow dam to cross over at the end.  The water is about the clearest I've seen around here and depth around 1 to 20 feet in a vast portion of this area. We caught 4 all bass around 16 in and 2 White perch. 


Son Angelo got his first bass here. Using deep diving cranks and white curly tailed grubs on jig heads


Here is a little video of our trip.  We hope that you like it.
 
 
  After were we done fishing we went over to the boat portage and had a little fun.


We made it back to the boat launch and it was time to go home.
 
 
Mission Accomplished and a well traveled day .  He deserved this nap.
 
 
The End

Sunday, July 14, 2013

New Water To Fish For Sons Birthday


  It was a great day to be out on the water with one of my fishing buddies for his birthday.  This day was a day of first for him and I both.  To start our journey we headed out to the Pungos driving though farm country on our way to new water to fish.  Our goal this year is not to fish the same spot twice so we picked a spot and headed off.  Our adventure lead us to Old Pungo Ferry Rd.  At the end of this road is an old marina that looks abandoned and a newer kayak launching area that is free to park. 


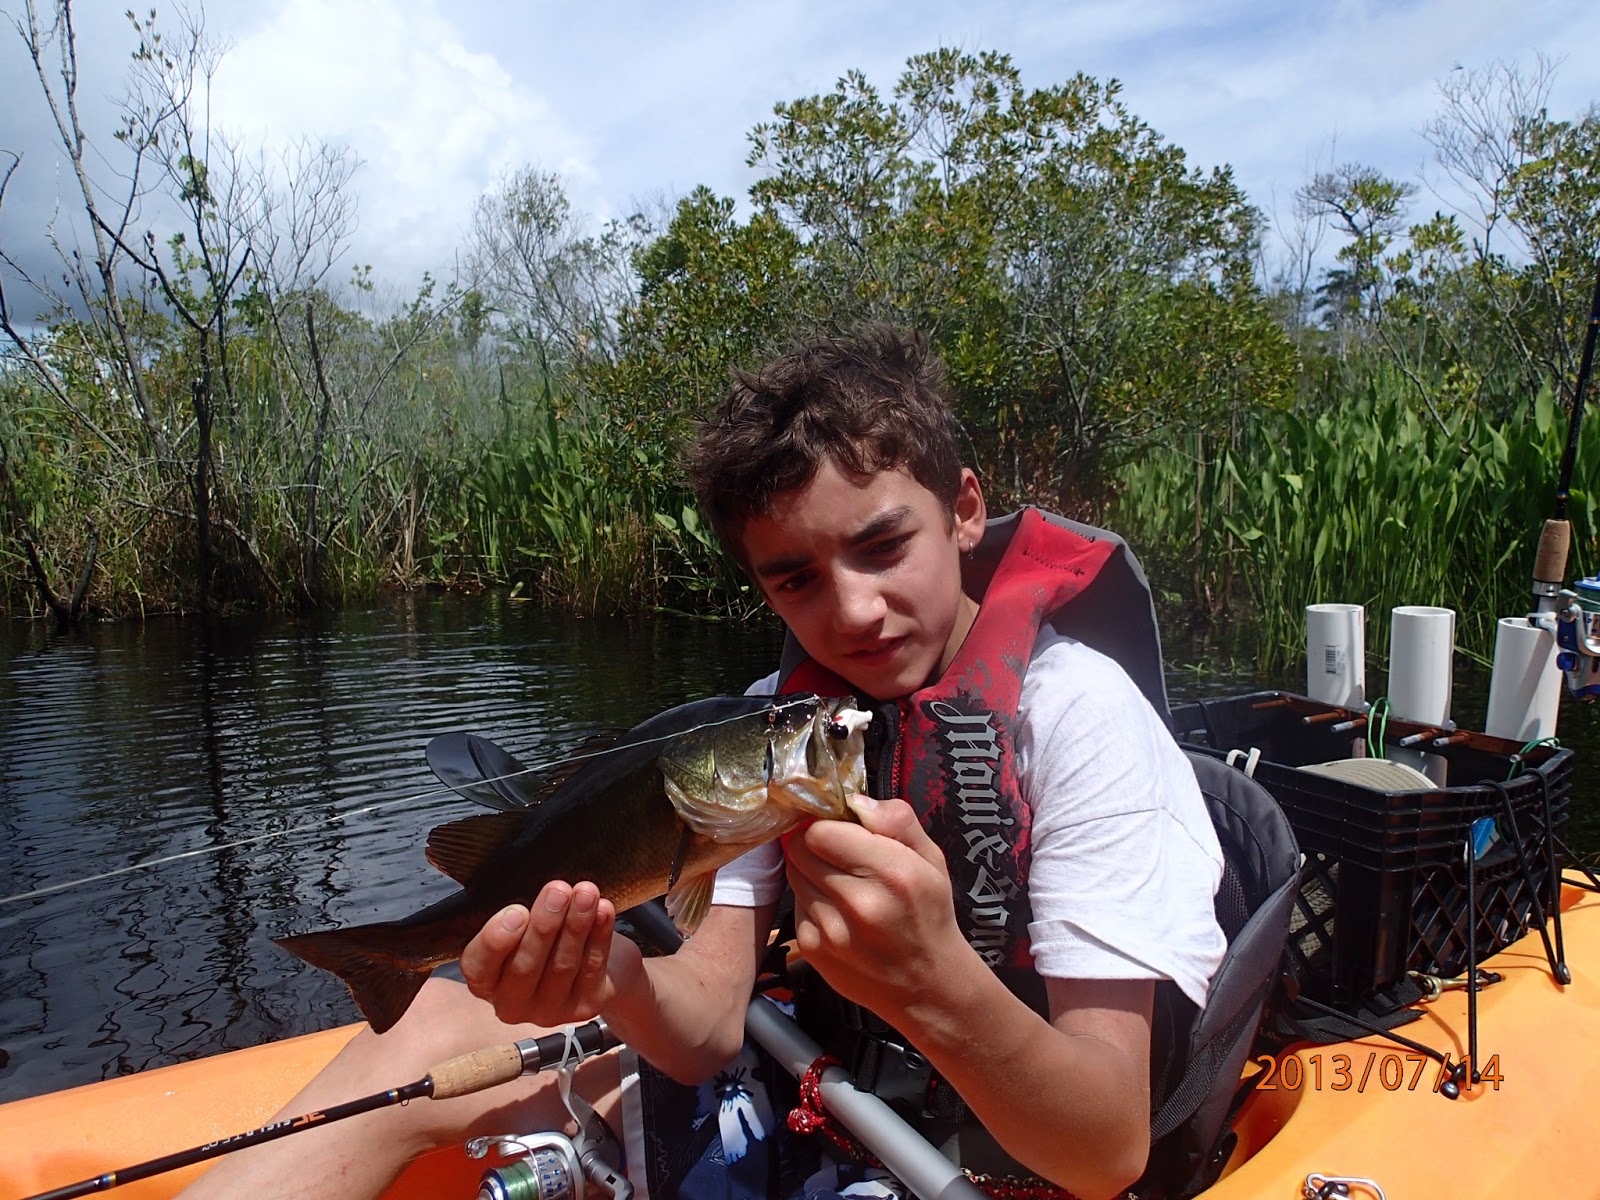
  Once in the water we headed north toward Altons Creek.  Armed with Beetle Spins we attacked the grass edges and Orion was able to land his first bass.


    I kept hooking up with Yellow Perch that never made it to the boat .  After a while it was Orion that had caught anything then the wind started up and we started getting pushed against the grass so we high tailed it up the creek towards the feeder ditch that leads back to the main river.

 
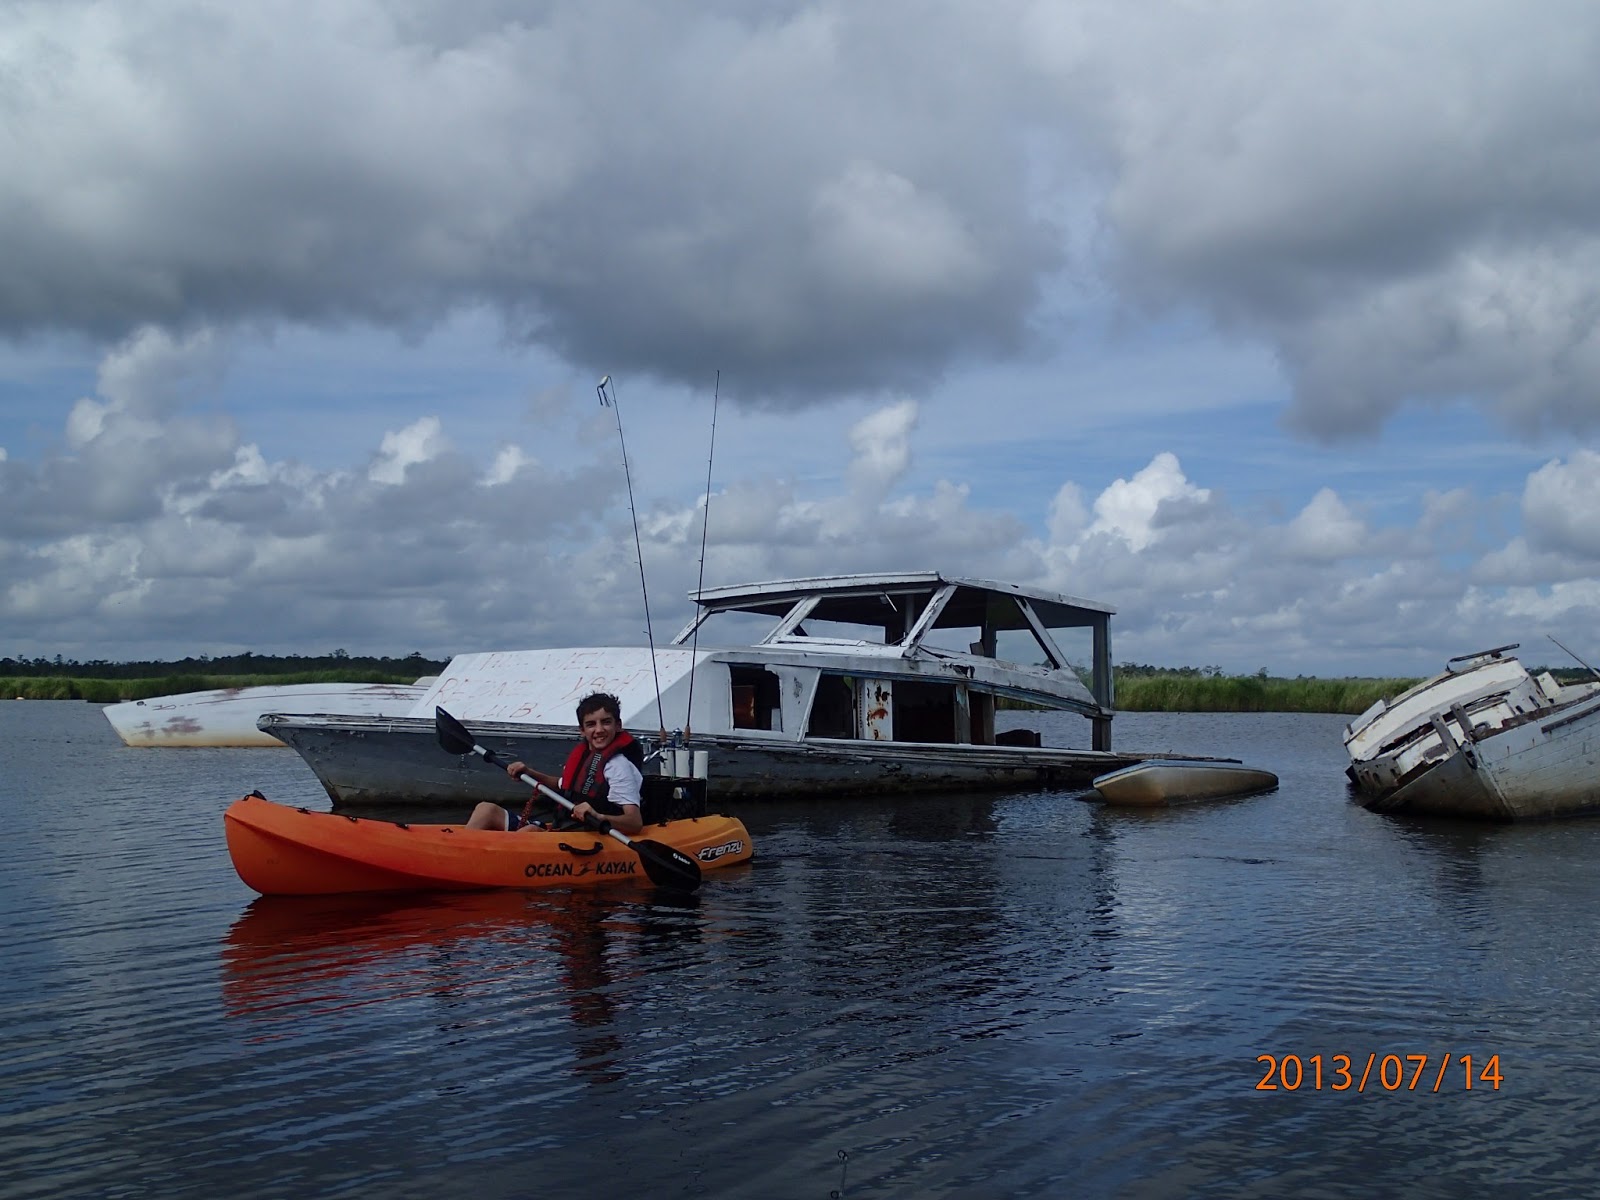
   Once back to the main river we started out way back and took the upper horse shoe and found something cool.


  What we found was a boat graveyard where people have left there dying boats.  There looked like old barges as well that were everywhere just rotting away. We attempted to fish here as well but just more rubble than anything so we headed out across the river to some man made channels and we fished there.


  It wasn't long and Orion got hooked up again with another bass and we knew we found a great spot. 


  We caught us some Bowfins here as well in this little channel.  My son got his fist ever Bowfin then I caught one as well.  It was a fun time.

More bass for Orion then I was able to land my first Pickerel.  Cool looking fish if you ask me.


  We head further into the creek and we both land a few Bluegill then at the end of the creek I end up with the smallest catfish I have ever caught in my life.  

 
After that it was close to noon and we both were starting to feel the heat of the day upon us so we headed back to the launch.  Six hours on the water for the both of us and what an adventure we had.  I look forward to coming back to see this stuff again.  So much still to check out and fish we didn't have the time for.  So until next time we will see ya on the water.
 

Tight lines everyone.

Saturday, July 6, 2013

The Original Kayak Fishing Lure

Rainy Day Project DIY

The Kayak Fishing Lure

By David Sanders

also seen in
Kayak Angler Magazine Online
https://www.rapidmedia.com/tackle-kayak-fishing/item/1437-diy-kayak-lure.html
 
   This is a project that I have wanted to do for a while.  I thought how cool it would be to make a lure that looked like a kayak. Here is how I completed this build.  With a little imagination and some things you could find in your junk drawer you can make one of your own.
Items needed for this project:
ü  Soft wood
ü  Pencil
ü  Fast drying 2 part epoxy with small mixing cup and mixing stick
ü  Knife and or a scroll saw
ü  A hand die sander/ grinder  tool or similar
ü  Paint and brushes
ü  Spray on polyurethane
ü  Eyebolts

ü  Split rings

ü  Hooks
ü  Sand Paper

1.       Take some soft wood and cut it down to what you would think your own kayak would be scaled down.   For this build I used some 1 ½ “x ¾ “furring strips from a local hardware store and cut it to 5 ½ “long.

2.       Next I drew some guide lines to reference the shape of my kayak on all sides.   These lines will help keep you from cutting to much out of one side than the other and retain a even look in the end.

3.       Now with a sharp knife or scroll saw cut out the general shape of your lure.  Don’t worry about shaping it much until you have carved out the seating and cargo areas.  By doing that you will be able to have a more stable base to set the kayak down while you carve the seat and cargo areas. 

4.       Carve the seat and cargo area out of the boat then start to shape your lure along the guide lines you made earlier.  After you have your shape cut out you can then fine tune the features with the sander and regular sand paper till your line now run smoothly and you are satisfied with the look.

5.       Added to the look of this rigging party I took a golf tee and with the die sander I carved the head of the tee to look like my fish finder.  Once satisfied I drilled a hole for the placement then glued it in.  That will help it get to the fish.  Next I found a small plastic square tube and cut the bottom out to resemble a milk crate

6.       After you have sanded it smooth,   dust it off and proceed to the painting process.   At this time I glued the eyebolts in with the epoxy then applied a sealcoat on the wood.  That will help water proof your lures and made it ready for paint.  Seal and paint your lure in a well vented area.


7.       Glue in your milk crate with the 2 part epoxy.


8.       Once all paint and detail have been applied I then spayed the lure with clear polyurethane and let dry.  One or 2 coats is all I needed.


9.       Attach your split rings and hooks then test float your lure in the sink.


10.   Now happy with your creation, enjoy it and go out to try to catch a fish.